Showing posts with label suzani. Show all posts

August 17, 2014

What I 'Chairish' Most

Okay, time to grind the gears back in motion! I haven't been blogging much, but I always like to think I'll get back to it soon, so when I was contacted by Chairish with an interest in having me create a style board around a piece of furniture, in this case one of their accent chairs, it was a perfect reason to dive back in.

You guys know about Chairish, right? I'm sure you do, but just in case you don't, it's a fantastic full-service site dedicated to helping you buy and sell amazing curator-approved finds for your home. What does that mean? Well, it means they've done the legwork for you in sourcing pre-owned, gently used items in great condition.  I first heard about Chairish through designer Emily Henderson's blog.  You know how designer types are always changing up their decor and/or hoarding those great flea market finds? Well, sometimes they need to make way for the next look or great score, so they head to Chairish to list the items they no longer need (or have room for!) Imagine the thrill of scoring your best Craigslist find ever....it's like that, but 100 times better! Seriously, you could furnish an entire room in under an hour with the things they have listed. Everything from James Mont to Jonathan Adler, Mid-Century to 80's Glam, architectural fragments, accessories galore, pillows! rugs! mirrors! You get the picture (and yes, they have artwork too.) All at fair prices, and with a 48 hour return window, so in the odd chance that French arched window doesn't fit because you forgot to measure for ceiling height, well you're covered.

My challenge in creating a style board was to imagine a plain white space and make it bright and colorful using my favorite accent chair from the Chairish site. Because they have so much to select from, I had a hard time narrowing down my choices to just one style board, so I created two! Here are a few.....or 50!....things from their shop that I love.


Using this green Eames style chair as a jumping off point, my first board features Green as the star of the show.
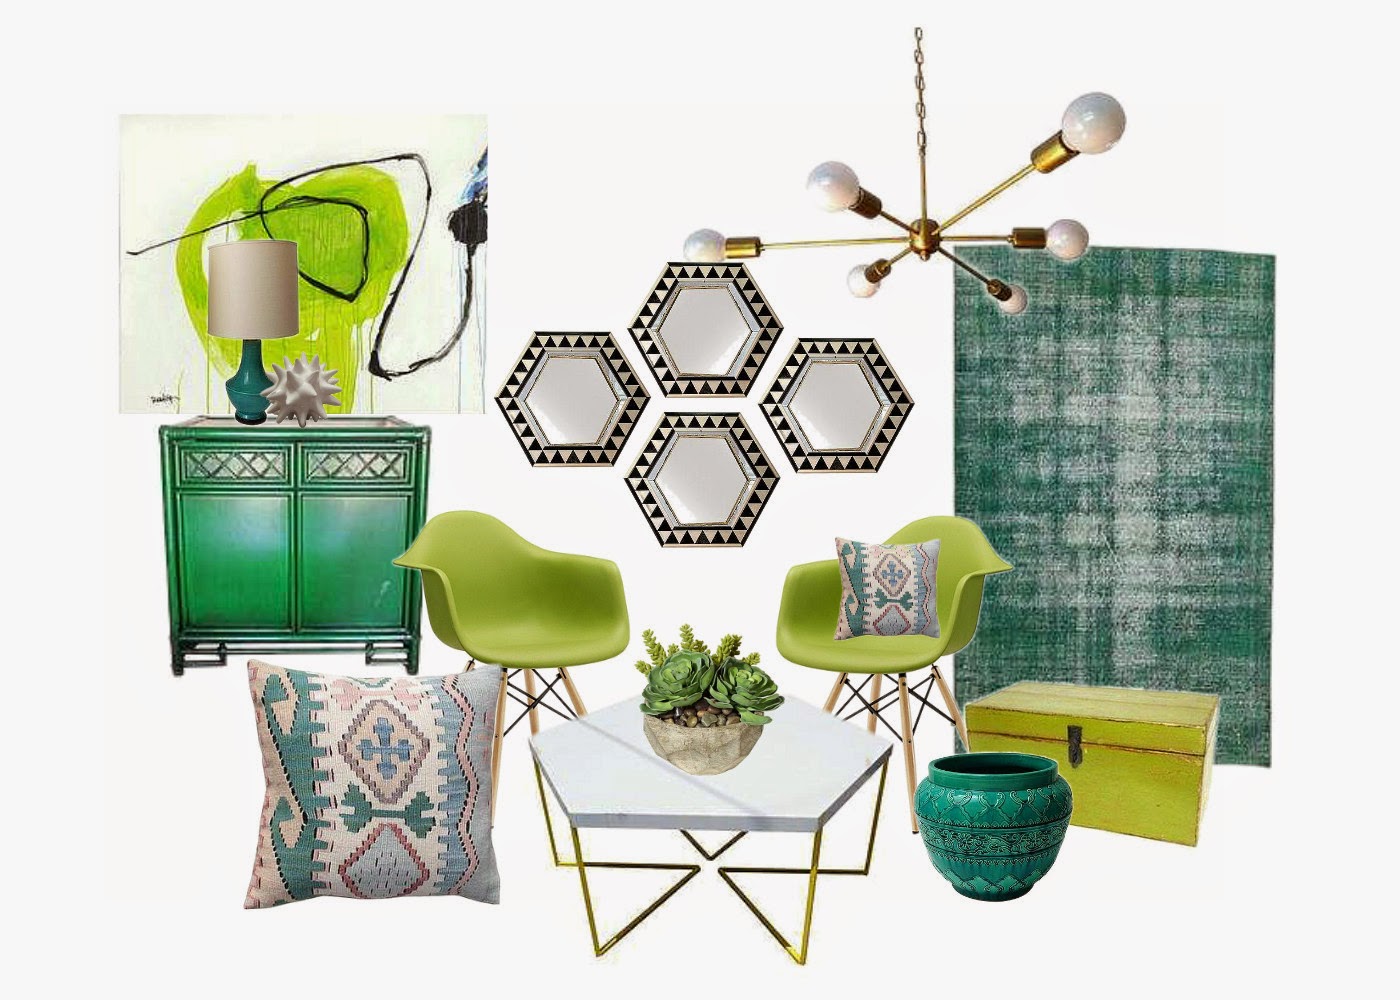


I'm a big fan of mixing elements of different styles together. I like to refer to it as Mid Century Moroccan or Modern Ethnic design, a look I use extensively in my personal space. I'm loving the fresh mix of green and blue-green hues here; It's both refreshing and soothing at the same time. I totally dig this room and would install this in my own home in two seconds flat!


.....


 If you follow Chairish on social media, you'll see they will often post a pic of an unfurnished white room with HUGE potential and ask #whatwouldyoudo? with the room

This was the latest installment

Gorgeous, right? Man, I love the 'Barn' feel of this, with those wide plank wood floors, high pitched peaked ceiling, and wide door opening. With a blank canvas like this, you could go in sooo many directions, but since I love color and the challenge was to take a room from white to bright, I chose an ultra-saturated purple chair and pictured it in that awesome space as my inspiration.


This fab armchair by Safavieh had me at Purple.Cotton.Velvet! In addition to many, many vintage finds, there is some newer merchandise offered as well, so it's always worth entering a current brand name in the search bar to see if your favorite maker is listed. Just a little tip ;-)


I rose to the #whatwouldyoudo? task with this style board, using that gorgeous purple chair to inform my other choices, and I must say I'm a little jealous of this room and wish I could live in it! Again, mixing modern elements with international accents is a look that really works for me and taking a room from white to bright is easy when you have color like this to work with.


So you see, you really could furnish an entire house using all items from the Chairish site. What are you waiting for? Go check them out! You just might find that perfect, one-of-a-kind element you're looking for to make your space uniquely yours. Enjoy!


disclaimer:I was contacted by Chairish to write a post, all opinions/product choices are my own.

April 25, 2011

Fabulous Floorcloths Part 3 and a Style file Segment!

Happy Monday all! Things have been silent here at Design Share for a little bit. One of the things I read about starting a new blog is to be consistent with your posting, and I have tried to post at least once a week, but sometimes life just gets in the way, ya know?! I have had some major upheavals and life changing events these past few weeks and boy let me tell you, the wind just doesn't seem to fill my sails most days. But, I'm trying to be positive and like the saying I posted about here, "Keep Calm and Carry On."  On that note, I'd like to finish out the series I have been posting about floorcloths. If you missed the first two posts you can see them here and here. The previous were examples of how to make a traditional floorcloth, but for today I wanted to show you guys a cool way to make a floorcloth that doesn't require any painting or designing of any kind on your part. All you need is a good eye and some bargain hunting skills, and I know ya'll have those in abundance. So lets get started!

I was shopping at my beloved Target and saw some GREAT printed tablecloths from the DwellStudio Line on the clearance endcap. Already reasonably priced at full price, they were clearanced out to$8.98! I don't normally use tablecloths, but couldn't pass up this bargain! I started wondering what other things I could do with them...Wall hanging? Foot-of-the-bed pop of color? Curtains? Slipcover fabric? Then I spotted a round one with a Suzani print, and got an idea!

Some clear, satin finish WATER BASED polyurethane....

And the aforementioned, fabulous, Suzani Print tablecloth.....
......combined, would make a great floorcloth!  No painting, no measuring, no planning, just roll on a few coats of poly and you have a durable, easy care and GEORGEOUS floorcloth! Already hemmed and everything! I think the round shape is what triggered the idea for me, as I have been a long time looking for a round rug that I liked.  
Straight out of the package (I didn't wash it first since I was going to be coating with poly anyway, I wasn't worried about shrinkage) I laid the cloth out on my garage floor. I didn't, but you would probably want to use a dropcloth or some protective layer so you work surface doesn't get coated with poly. I smoothed it as best I could, and started to roll the poly on with a foam roller.
About 10 minutes after the first coat, I lifted the whole cloth off the floor so it wouldn't dry stuck to the floor and laid it back down lightly where it was. Water based Poly dries fast, so you want to make sure to do this step BEFORE it dries enough to stick to the floor. I did this step twice, at ten minute intervals, just to be sure it didn't stick. Once the first coat was completely dry, I rolled on a second coat, and again lifted the whole cloth after ten minutes.
Some wrinkling occurs, but don't let it worry you. It will smooth out when you lift it off the floor and lay it back down. After it dried, I rolled on a third and final coat of poly. I felt three coats was sufficient to give the cloth good 'body' and protection from spills and wear and tear. If you want, you can also coat the backside of the cloth just for extra protection.  The last step is to back it with a rug pad. I used a cheapie walmart rug pad that I cut to fit my circle. I attached it with double stick tape all around the circumference and at several interior points. You could also use a spray adhesive, but will want to choose a rug pad with a tight 'weave' to make sure the adhesive doesn't come through and stick to your floor! Finally, you will want to place your beautiful floorcloth, step back and admire your handiwork!!
I used mine in my daughters room, where it fits the space perfectly and adds a beautiful pattern I am hard pressed to find in any traditional area rug! And... shhhh...*whispering* our dog even peed on this and it damp mopped right up. Because it's coated with poly, nothing sinks in, it all sits on the surface and wipes right off!
The culprit!

Edit: I have had many people ask questions regarding this project. I will try to answer some questions readers have had....

It is VERY IMPORTANT that you use WATER BASED Polyurethane. I don't think I clarified that before and hope it didn't cause any confusion.This floor cloth works best on hard floor surfaces such as hardwoods, tile or concrete floors (what I have in my home) It is a 'floorcloth' NOT a carpet, so has no cushion to it other than the rug pad you add underneath. If you added a really thick pad or a piece of carpeting foam under it, it would be more 'comfortable' I am used to walking on concrete floors all day, so the lack of cushion has no effect on me.

This works best with natural fibers, like cotton or linen. To be sure, I would stick with 100% Cotton, which is what the tablecloth I used was made from. I really don't think this will work on synthetic fibers, but if any brave souls want to experiment and let me know what your results are, that would be great! This WILL NOT work on a tablecloth already coated with vinyl...It may be stating the obvious, but just want to be clear. Additionally, any fabric with a 'plush pile' will not work....velvet, chenille etc. This is a *floor cloth* we are not trying to simulate *carpet*!

The polyurethane coating is pretty flexible once dry so it doesn't feel 'crunchy', as some people were concerned about. Some have asked if it would work to layer the cloth over existing carpeting...I think it would be fine, but go ahead and try it! My motto: if in doubt, try it out! If it doesn't work, hang it on the wall as a 'tapestry!'

If you intend to use this outdoors, such as a patio, go ahead and coat BOTH sides of the cloth to really ensure a good protective layer and I probably wouldn't leave in direct sun for any serious length of time. A covered outdoor space would be ideal.

I have taken mine outside and hosed it off when the surface gets grungy (from normal wear) and used a mild soap. It cleaned right up. Of course mopping also works.

Good luck and thanks again for all the great questions! Hope this helps....

To follow up, I'll share my most recent segment on KVOA channel 4 here in Tucson, talking about floorcloths. I hope you enjoyed the series and I hope you will try making a floorcloth using one of the methods I talked about. If you do, I would love for you to share them with me. Thanks for visiting!

**UPDATE** Hi everybody! Well, it seems that KVOA doesn't have that video segment "Laura's Style File" up on their website anymore, but I'm working on getting a copy of it to re-post so stay tuned!


Related Posts Plugin for WordPress, Blogger...